
Keeping your crypto in some cold storage is just another basic aspect of OpSec and safety. Its the one way you can rest assured that your funds are Safu! Whether you’re a darknet user or just some crypto investor, there are many reasons to move your Bitcoin and Monero into cold storage to keep your assets safe. We will run through how to protect your Monero and Bitcoin assets using a cold storage wallet.
What is Cold Storage?
Firstly, we need to clarify what cold storage is. Cold storage is the term used by crypto community users to describe keeping your digital assets on a device that has no internet connection and can only be accessed with a passcode. It’s the ultimate way to keep your assets offline wallet and thus safe from any exterior threats. For Darknet users and for those looking for ultimate safety or privacy. A cold storage is a great place to store your funds for a longer period of time, but if you plan to use the funds regularly or aren’t planning on keeping them to the side for a decent period of time, then cold storage is not recommended.
Why Should I Use Cold Storage?
While setting up cold storage can be tedious, if you want to keep your digital assets for a longer period of time without the risk of cyber theft, cold storage will be the equivalent of a supermax bank vault with all the bells and whistles. However, for disclosure, no storage is 100% safe, as seen with Ledgers wallet and its major issues in the past few months.
What You Need to Get Started
Darknet Markets primarily use two cryptocurrencies. Monero, and Bitcoin. Monero is the ultimate privacy coin, and Bitcoin as an easily accessible and the most popular cryptocurrency. This means that being able to add these two currencies in cold storage is going to be valuable to a large community.
Bitcoin and Monero have different methods of creating and using a cold storage wallet. Both need a device that will be used entirely offline. Its also suggested to have an operating system on this device known for its optimized security protocols. Operating systems such as Tails, Linux, or Ubuntu are great examples.
Secondly, you must have the corresponding offline address for Bitcoin to receive your money or the MoneroAddress utility for Monero transactions. For Monero, you might also need to download TAILS to create a bootable drive as an offline device. For Bitcoin specifically, you will then have to create a paper wallet. Using one of these two sites should help:
This sums up most of what you will need to create cold storage. Now let’s get down to how you do it for Bitcoin and Monero.
How to Set Up a Cold Storage Wallet for Bitcoin
Kicking off with creating cold storage for Bitcoin is reasonably straightforward. Follow these steps to create a cold storage wallet for your Bitcoin successfully.
There are various methods for adding your Bitcoin to a cold wallet; if you want a hardware wallet, then something like Trezor, Elliptical, and Ledger are some solid options for devices to store your funds on. However, it’s possible to do something as a simple piece of paper to store your Bitcoin.
Remember, cold storage just means you’re keeping your public and private keys offline. These are what unlock access to your funds which are always on the blockchain.
Using a Paper Wallet
To use a paper wallet, you need to create a “public/private key pair” without any connection to the internet. You can use a website like Bitcoin.com’s Paperwallet to generate your own new keys. Ensure to generate these keys “offline” by disconnecting your internet once the website has opened. Follow the site’s instructions and move your mouse around/ type in random letters. This jumbles up the encryption code. From there, you can download the keys. You should also get a QR code and address to send your funds.
If you need to access the wallet, you simply import the cold storage wallet to an online Bitcoin wallet. Usually, that means you tap “Import” or “Add Wallet” and follow the instructions.
Using a Hardware Wallet For Bitcoin

Your typical hardware wallet comes as a small USB-like device that you simply plug into your PC. However, some might stand alone as a device that resembles a mobile phone. When you receive a new device, you’ll want to enter a unique pin (check our OpSec page) and recovery phrase. It’s advised that you store these codes somewhere safe and physical like a piece of paper, but for ultimate anonymity and to ensure you are the only one who could ever access the device, then you should tread lightly on keeping physical passwords.
This is all similar to your typical online wallet, except all your keys and information is encrypted and stored locally on the device. Once completing your passwords you should get a brand new wallet and public key. Most hardware wallets support multiple cryptocurrencies and some even come with software to add more wallets, and monitor your funds.
Some wallets even need you to confirm all transactions manually before any release for extra security.
How to Set Up a Cold Storage Wallet for Monero
Monero is a much more tricky wallet to create offline. Creating a Cold Storage Wallet is similar to the one for Bitcoin. You’ll need a third-party application and, unfortunately, there are limited third-party wallets that support Monero. There is talk of Ledger developing support for Monero, but regulators won’t like that.
So you might need to use this method instead. Let’s line up what we need quickly. You’ll need two USB drives, a computer that you’re comfortable doing this online with, TAILS installed, and a mnemonic seed generated for your cold storage wallet.
Step 1: Download TAILS (The Amnestic Incognito Live System)
We suggest downloading TAILS because its primary purpose is to ensure your device is not compromised while running the MoneroAddress Utility, which generates your key for your cold storage wallet.
To install TAILS, you must go to their website and select the installation package for your Operating System (Apple, Windows, etc). Follow the installation instructions, and you should be sorted.
Step 2: Run TAILS and Generate a Random Address
Right, so now that you have TAILS installed, run the program. Go to the MoneroAddress Utility and triple-check that the site is secure by checking the little green lock in the top corner of the address bar.
Follow the instructions until a new address is generated. Write this 25-word address in a safe place and ensure no one sees this code. There will likely be a spend key and a view key. Record both keys. Once you are sure that you have recorded the key/address correctly, you should be able to send money to it safely. You will also receive a seed code to restore these finances to your active Monero wallet.
Unfortunately, with a cold storage wallet and Monero, you cannot check the current available balance in the wallet. However, you will see the balance when you remove the money from the cold wallet to your online wallet.
To re-add the finances to your existing Monero wallet, you must re-enter the seed you receive at the opening of the cold storage wallet. For more info on how to do this, check out how to restore your Monero Wallet.
Types of Cold Storage Wallets
If you would rather use a third-party cold wallet to help you create a cold wallet, a few on the market are well known for their security and easy-to-use interface. Let’s take a look at some:
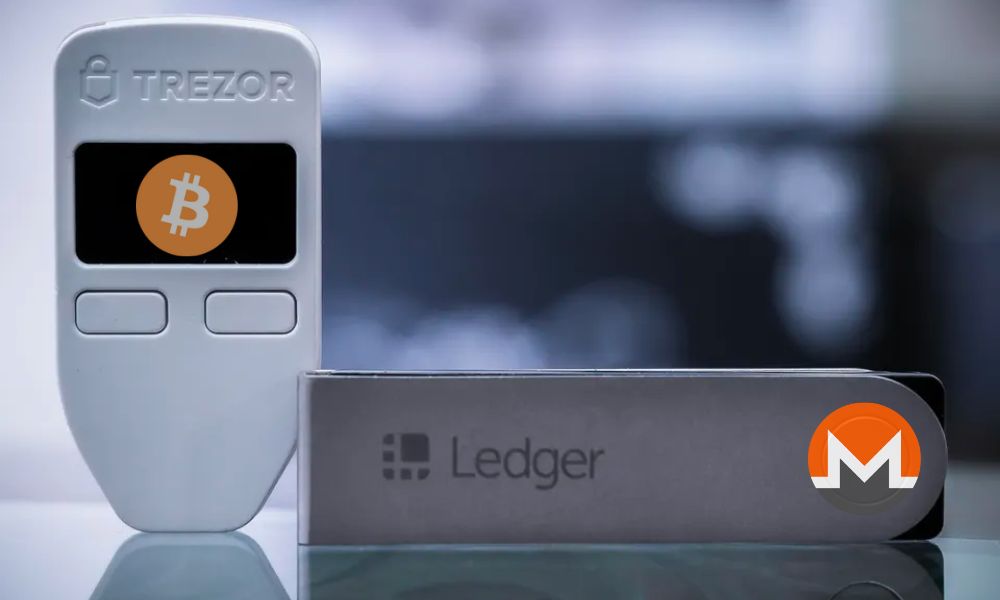
Trezor
Trezor is an entry-level cold wallet provider. It allows you to use a USB to create a safe place for your wallet. Unlike other apps, it does not allow for Bluetooth compatibility. To use Trezor, you can expect $72 or $213 for their Model T subscription. Trezor is supported on Windows and Android but not iOS.
Ledger
Ledger is one of the more popular cold wallets. Coming into the market at $79 with support of over 5,500 cryptocurrencies, you can understand why. They allow USB and Bluetooth connectivity to keep your wallet secure. iOS and Android are supported.
We should note they’ve run into a major issue where they’ve suggest storing users keys on external storage so that their users can restore wallets. This may sound positive but the device was built to be offline, and adding your keys online goes against its entire purpose. *This is an opt in service.
Elliptical
Ellipal is identical to the above wallets; however, you must scan a QR code instead of using a USB or Bluetooth to use the software. You need to install the software on a device (USB/mobile phone) to use any of the above cold storage wallets. Then use the key provided and send your crypto to your given address.
Conclusion
If you’re a person looking to keep your Bitcoin or Monero storage in an extremely safe and secure place for multiple months/years. Then a cold storage wallet is your ideal bet as it makes it virtually impossible for any hacker to gain access to your funds. For ultimate privacy through it all, you’ll want to consider Monero as your main option. Darknet users often use their funds on the fly and regularly, so a cold wallet is not always your first choice, but it’s one to consider.

Hey there, I’m a dark web geek who’s been around for the last 8 years. More precisely, I’m livedarknet’s senior content writer who’s been writing about darknet marketplaces, tutorials, and cybersecurity stuff for educational purposes.